Why is my GBC Ultima 65 Laminator not working?
Parts Lists:
Need parts? Search the part numbers you need using the top Search bar!
Which Ultima 65 do you have?
More Info:
- Ultima 65 Setup & Operation Manual
- Common Lamination Problems
- Theory of Operation
- Theory of Successful Lamination
GBC Ultima 65 & 65-1 Troubleshooting Guide:
With the original Ultima 65 or 65-1, the issue is likely the rubber keypad that sits on top of the control PCB. When it gets worn down, it can create issues with the Reverse, Run and Stop buttons.
I would start with replacing part number "704090313 - RUBBER KEY S/W U-65 637400077". 99% of the time replacing this part resolves this issue. We have technicians that can replace this for you if you don't have your own tech.
Question:
When we push the button second from the bottom (Run?) over time the machine has become more and more non-cooperative.
Eventually the button had a "sweet spot" that had to be carefully pushed to get the machine to operate. Now, there is either no reaction to pushing the button, or the wheels on the machine begin to turn backward.
We have an identical machine in another building. When we swapped this part with the one that we know works, the machine worked perfectly.
Technician Answer:
If the model is an Ultima 65-1, most likely what you'll need is the rubber keypad (membrane) that sits between the buttons and the control PCB.
This is the most commonly replaced part on the 65-1 model, and 99% of the time resolves issues with unresponsive controls. I would recommend Part Number 704090313.
The reason for the machine working when you swapped the control PCB from another machine is likely because you either a) kept the rubber keypads on their respective boards, so technically the pad on the old machine was being replaced, or b) as these keypads wear down, sometimes a slight realignment can make them work again until they slip back into its original position, then it'll stop working again.
If after replacing the rubber keypad you still have issues, then I would look at replacing the control PCB itself.
My laminator makes the button beeping but nothing happens. It's heating normally and the safety guards are down properly, what do I do?
For the original Ultima 65 & 65-1, the most likely issue is the rubber keypad, part #704090313. If that doesn't fix the issue, the next thing to check is the control panel, part #706011113. If that's not it, the next thing to check would be the main PCB (part number varies based on Serial Number, call us at 1-866-455-9900).
GBC electrical parts are non-returnable, but other GBC parts can be returned without 30 days from date of purchase (restocking fee may apply).
Please reach out to us with any questions at 1-866-455-9900 for friendly help & fixes.
Heats up, only beeps when "Run" is pushed, but "Slow" option works:
Question: The laminator will heat up, but when I push the "run" button it just beeps. It will work if I push the "slow" button.
Answer: When this happens, it just means the front cover is still open. Or the micro switch is not fulling engaging. Check the inside of side cover to make sure the rod is pressing the micro switch in fully. If you still have trouble please call us at 1-866-455-9900 and we'll help you further.
No power:
- No outlet power - Check outlet for correct voltage.
- Power cord disconnected - Connect power cord.
- Blown fuse - Check continuity, replace if needed.
- Tripped circuit breaker - Reset circuit breaker.
- Tripped TCO - Reset or replace TCO.
- Power switch - Replace switch.
- Bad connections - Inspect for loose connections.
- Bad Main PCB (PCB1) - Replace board.
Power, no heat:
- Bad connections - Inspect for loose connections.
- Infrared heaters bad - Check for 16 Ohms, if not replace heaters.
- Triac failed - Test triac, replace if needed.
- Heat sensor failed - Test continuity, replace if needed.
- Bad Main PCB (PCB1) - Replace board.
Not hot enough, or too hot:
- Main PCB (PCB1) not calibrated - Calibrate Main PCB (PCB1) using current calibration procedures.
- Triac failed - Test triac, replace if needed.
- Heat sensor failed - Test continuity, replace if needed.
Power, heat, will not run:
- Bad connections - Inspect for loose connections.
- Blown motor fuse - Check continuity, replace if needed.
- Interlock switches not engaged - Ensure tray and shield switches are engaged.
- Bad motor - Check continuity, replace if needed.
- Bad Transformer - Check for 3-32 VDC, replace if needed.
- Bad Main PCB (PCB1) - Test output, replace if needed.
Runs one speed or reverse only:
- Bad Main PCB (PCB1) - Replace Main (PCB1).
- Bad Control Panel PCB (PCB2) - Replace Control Panel (PCB2).
Unit does not go to ready:
- Main PCB (PCB1) not calibrated - Calibrate Main PCB (PCB1) using current calibration procedures.
- Bad Control Panel PCB (PCB2) - Replace Control Panel (PCB2).
- Heat sensor failed - Test continuity, replace if needed.
Poor lamination quality:
- Laminator settings incorrect for product being laminated - Check "Common Lamination Problems" and the "Theory of Successful Lamination".
- Incorrect tension - Follow "Film Tension Adjustment" in the How to Use Guide.
- Incorrect roller pressure - Adjust roller pressure.
Consistent wrap-ups, adhesive marks on product:
- Dirty rollers - Follow "Caring For Your Laminator".
POWER Lamp does not illuminate when ON/OFF switch is in the ON "I" position:
- Laminator not connected to electrical supply - Insert attachment plug into receptacle.
- Circuit breaker open - Reset circuit breaker.
Heat rollers do not turn:
- Safety shield in upright position - Lower safety shield.
- Feed tray interlock pin not in place - Slide interlock lever all the way into the left side frame.
Laminated items exhibit curling:
- Tension between the top and bottom film roll is unequal - Adjust tension per section Film Tension Adjustment.
Laminated items exhibit wrinkles:
- Tension on top or bottom roll of film is too loose - Adjust tension per section Film Tension Adjustment.
- Speed setting is too slow - Slightly speed up laminator.
- Bottom film roll may be improperly loaded - Make sure bottom roll of film is around idler bar.
Adhesive deposited on heat rollers:
- Top and bottom film webs not aligned - Align film webs per section Film Alignment Procedure.
- Film improperly loaded - Adhesive (matte) side of laminated film may be against the heat rollers. Load film per procedure outline in section Film Loading & Threading.
Unsatisfactory adhesion of laminate:
- Speed setting too fast for type of material being laminated - Lower speed setting by pressing SLOW button to slower speed.
- Insufficient heat - READY lamp must be illuminated.
- Laminate improperly loaded - Adhesive side of film must be facing away from the heat rollers. Bottom roll of film not threaded behind the idle bar.
- Heat rollers require cleaning - Clean heat rollers per procedure in section Caring for the GBC Ultima 65 Laminator
- Laminated item unsuitable for adhesion - Item may be dirty or may have non-porous surface that is extremely difficult to laminate.
GBC Ultima 65-2 Gray Troubleshooting Guide:
How to clear error code "E04" from GBC Ultima 65-2 Gray laminator:
Tech Team instructions: Check cable & cable connection, if good might have to change both the control board and main PCB at same time.
More info:
5.1.23 CONTROL #24 - CONTROL PANEL DISCONNECT: E04 ERROR = CONTROL PANEL IS DISCONNECTED (COMMUNICATION BETWEEN THE MAIN CONTROLLER BOARD AND THE USER INTERFACE BOARD IS LOST).
If control panel is disconnected from the main PCB, all heat and motor functions must stop.
Main Board Response: In the event that the main board detects no communication with the interface board within a predetermined time period, the heat and motor control functions will be turned off.
Interface Board Response: When the interface board detects no communication with the main board within a predetermined time period, a blinking "E04" (Error 4) will show on the temperature display and the audio chime will beep at the same rate as the blink.
Pressing any button will stop the beep. The "E04" error message will be cleared and the default Footage Counter will be displayed after communication is established.
Symptoms & Solutions:
| Symptom: | Possible Cause | Corrective Action: |
|---|---|---|
| Machine will not turn ON | The Main Power switch on the back is not in the 'ON' ( I ) position. Laminator is not connected to power source The Fuse has been blown | Move the main power switch to the 'ON' ( I ) position Insert plug into appropriate receptacle Reset the circuit breaker |
| Machine is ON but will not run | Heat Shield or Feed Table are not fully closed to activate safety switch | Ensure the Heat Shield and Feed table are fully closed. |
| Machine rollers stop/stall while laminating | Media is too thick Look for film wrap around rollers | If possible use thinner media. If film is wrapped around roller use procedure outlined in Clearing a Jam. |
| Film Doesn't Stick to Media | Machine not hot enough Running to fast Wrong Film Setting Adhesives will not stick to select Inks/Toners/Toner Oils/Coatings | Ensure ready light is on Try slower speed setting Confirm proper film thickness selected If possible print document on another printer |
| Film or Media appears cloudy, milky or silvering (very small dots typically seen in dark areas) | Machine not hot enough Running too fast Wrong Film Setting Adhesives will not stick to select Inks/Toners/Toner Oils/Coatings Machine can also be too hot | Ensure ready light is on Try slower speed setting Confirm proper film thickness selected If possible print document on another printer If above does not resolve try letting the machine cool |
| Long Ripples appear on the Film and/or Media | Film is too hot when exiting the pull rollers on the back of the machine. | Slow down the laminator Common on longer lamination runs. Try shorter runs or stop to let cool when present |
| Waves on one side of the film or media | The film is walking during lamination due to uneven tension | Ensure all saddles are closed fully Try swapping the top and bottom film rolls |
| Waves appear outward from the trailing edge of media (Boat Waking) | Will occur on thicker media | Use thinner media when possible Slowing down will reduce amount of boat waking |
| Appearance of small dimples on media and film (Orange Peel) | Machine is too hot | Ensure Ready light is on Confirm proper film thickness selected Allow machine to cool |
| Media and film have little square patterns on the output (Checker boarding) | Film is too hot when exiting the pull rollers on the back of the machine. | Slow down the laminator Common on longer lamination runs. Try shorter runs or stop to let cool when present |
| Gap/Air Pocket between the edge of the media and the film (Tenting) | Typically found when thicker media is used | Try running slower Ensure ready light is on and proper temperature. When possible use thinner media |
| Film has bubbles | Uneven tension across the width of the film Debris in film and/or on the media or roller Cut or divot in the heat roller silicone | Swap the top and bottom rolls Wipe them down with a lint-free cloth Use caution when slitting film for roll changes or jams to prevents cuts into the rollers. |
| Film curls opposite directions on the edges as it exits the back. | Film supplies not properly matched during manufacturing process | Swap the top and bottom rolls |
| Media has curl when lamination complete | Film rolls have too much tension or drag on them. Film Rolls have different amounts of tension | Clean the film saddles with damp lint-free cloth. Film rolls should be approximately the same size. Try swapping top and bottom rolls to change the tension. |
| Wrinkles in film as the film enters the Heat Rollers | Not enough tension on film rolls | Ensure the saddles are fully closed Clean the saddles with lint-free cloth |
| Excessive Adhesive build up on the Heat Roller edges | The Top and Bottom roller are not aligned. | When using standard film make sure both rolls are pressed up against the film alignment O-ring on the shafts. |
Common Lamination Problems:
- Wrinkling at the edges.
- Excessive wrinkling between two separate laminated sheets running parallel to each other.
- Air bubbles in the lamination.
- Edge of lamination not sealed.
- Warping of product after lamination.
- Cracking of the printed material after lamination.
- "Silvering" on the laminated product.
- Creasing in various areas of the laminated product.
The previous mentioned conditions are not necessarily caused by machine malfunction. The following are examples of some conditions that may influence the quality of lamination.
Media being laminated - Some prints are made using synthetic materials. This material usually exhibits waves or wrinkles when laminated with thermal films. Pressure Sensitive Adhesive (PSA) films are best suited for this application. Thickness of product plays an important part in the laminator's ability to seal at the edge. As the thickness of the material increases, the chance of achieving a sealed edge decreases. Too little or too much heat or roller pressure - Excessive heat usually causes waves or warping of the finished product. Heat problems may also appear in the form of air bubbles. "Silvering" is a condition usually caused by insufficient heat. It is mostly noticeable in dark colors. Silvering may also be noticed when laminating with PSA films, which take approximately 24 hours to cure. If the heat is at the recommended temperature for both the film and the product and bubbles, waves, or creasing are still present, this could be caused by differences in roller pressure, front to back or left to right.
Differences in film manufacturing - The preset temperatures for the GBC Eagle are set for GBC NAP-II laminating film, using 20 lb. Bond paper. GBC Eagle laminators usually will laminate a variety of different manufacturer's film. When laminating with films other than NAP-II, adjustments to the preset temperatures and speed may be necessary.
Ink and toner coverage - Wide format and color prints are made in a variety of ways. The common trend is to use alcohol based inks, called GA ink, or oil based inks, called GO ink. The GA inks usually work very well with thermal films. The GO inks are sensitive designed for vinyl substrates. Another ink type is PIEZO, which is wax based and comes in a "stick" form; it may crack if folded or rolled tightly. Pressure Sensitive Adhesive (PSA) films are great candidates for these applications. Dry toner is commonly used in most copiers and printers in today's market. Some copiers/printers use water-soluble toner, while others like XEROX use fuser oil to fix the image to the paper. Fuser oil may not allow conventional laminating film to adhere to the paper. In most cases, GBC thermal HI-TAC film solves the problems of excessive fuser oil.
ROLLER PRESSURE BY THE FOOTPRINT - A laminator's footprint can visually provide a quick assessment of roller pressure. The footprint is the impression made by the heat rollers when the film is allowed to sit idle for three minutes or longer. For best results, use 1.5mil film for this procedure. Run approximately 3 feet of clear film through the heated laminator. Wait approximately 3 minutes for the footprint to form. Run another 3 feet of film and examine the impression. The footprint should be even on both sides and slightly thicker at the center. If this is achieved, run newspaper or lightweight paper through the laminator and check for lamination quality.
Paper Pull Setup Test - This test can be performed to correct roller balance problems. The test must be performed after removing or replacing rollers.
- Remove all laminating film from front and rear rollers.
- Cut several 1-inch strips of regular 20lb Bond paper.
- Gap the rollers and insert the strips starting the test with front heat rollers first. Place the strips at an equal distance, left, center, and right.
- Apply full pressure to the rollers and lock the rollers in place.
- Holding the strip at the end, centered, try to pull the paper out of the nip point at each area.
- If the paper can be pulled from any of these points, additional pressure should be added to the right or left side to increase the pressure at the specific location. The center pressure is affected by adjusting the right and left sides of the rollers. A recommended one full turn should be made to the side where the paper slips.
- Perform the same procedure for the rear rollers.
LAMINATION PERFORMANCE TEST - After adjusting the roller pressure to the previously recommended starting point, install 1.5 mil film on the laminator, set the temperature to the proper setting, and allow the heat to rise until ready. Before making any further adjustments, please check the laminated footprint again for the previously stated dimensions. If further adjustment is needed, perform the adjustment with equal full turns at the adjustment point.
Theory of Operation:
The laminator uses heat, pressure, tension and speed to continuously apply adhesive coated laminating film to both sides of sheet type materials simultaneously. Both electrical and mechanical properties of this laminator are described in this section. Electrical schematics and wiring diagrams are also provided in this section. A basic understanding of the theory of successful lamination is required for all personnel servicing the Ultima 65.
Theory of Successful Lamination
To obtain the ultimate in a successful laminate, three factors should be present:
- The product to be laminated should be receptive to, and capable of attaining, a good bond with molten polyethylene adhesive. Most paper products can be laminated with a high degree of integrity. This is because molten polyethylene cements to individual fibers of the paper surface. The rougher the surface texture, the more fibers are exposed to adhesive and the better the bond between adhesive and product. Many substances are applied to paper products, which impair bond between fibers and the molten adhesive. Ink and other printing products affect this bond. While good adhesion occurs between molten adhesive and ink, poor adhesion may exist between ink and its parent paper. Some ink products are heat sensitive and/or lack the ability to be bonded by certain lamination processes. This may require the use of pressure sensitive adhesive (PSA), NAP-LAM II, Vinyl, Premium or HI-TAC type film products. Some paper and card stocks are coated with silicones, wax or varnish, which inhibit the ability of molten polyethylene to stick tightly to individual paper fibers. In such cases, a superficial bond develops which may be adequate, depending upon intended use of the finished laminate.
Smooth surfaces, especially photographic, metallic, and plastic, are difficult for polyethylene to bond to, since no fibers are exposed for the adhesive to contact. This may require the use of other film products to laminate correctly. Products containing moisture will not laminate well since the fluid converts to steam, forms bubbles, and impairs lamination. - At the moment of lamination, the product - polyethylene interface - both top and bottom, must reach the lamination film's proper operating temperature. Superficial bonds develop at lower temperatures, and the finished laminate may be adequate for its intended use. However, for proper lamination please consult the lamination guide in section 10.Thickness/color of a product bears heavily on the ultimate integrity of the bond, since the thicker/darker a product; the more heat is extracted from the heat rolls. Thicker/darker products may extract heat faster than the machine can put in, and after 20 feet or so, the interfacial temperature may drop below the critical point. Generally speaking, most card stocks whose thickness is on the order of 0.012” thick can be laminated on a continuous basis.
- Total encapsulation of product, with a complete film-to-film border, is often recommended to prevent an otherwise successful laminate from splitting within itself. Total encapsulation of product, of course, prevents splitting from casual abuse of a corner or edge of the laminate, and obviously, moisture vapor or liquid cannot enter to weaken the laminated product.
Flush cutting of laminated product, or even slightly into the product, yields a neat, trim appearance but renders the product sensitive to splitting at the edges and particularly at corners. The split occurs within the product and not at the adhesive product interface. Flush cutting also leaves a paper edge exposed to the atmosphere and any moisture vapor it contains. However, this may be of little consequence unless the laminate is exposed to an actual liquid, where upon the fibers within the product loosen from one another and splitting occurs.
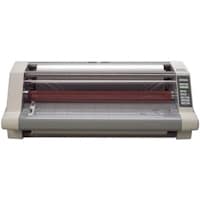
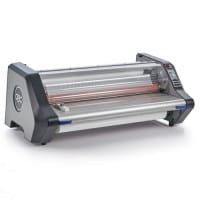
Ultima 65 Repair Service
We have local technicians all across the United States. ready to fix your Ultima 65. We service the original Ultima 65, 65-1, 65-2, and Ultima 65 EZLoad and all other models.
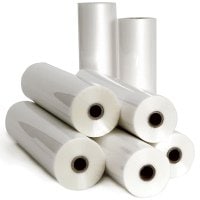
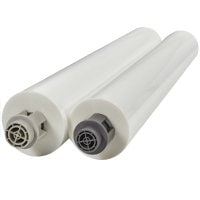
Get Ultima 65 Repair QuoteNew Ultima 65 Laminator & Lamination Rolls:
If you'd like a New Ultima 65 Laminator, or EZLoad/Standard Lamination Rolls, you can get them right here. The New Ultima 65 uses EZLoad & Standard Lam Rolls. These high quality rolls are guaranteed to run perfectly in your machine.